Tags
Tags provide a flexible way to organize and filter chains within the Polkadot Developer Console. Users can utilize default tags or create custom tags to suit their specific needs. To access these settings:
- Click on the Settings cog icon in the top-right corner of the console interface.
- Select the "Tags" tab in the Settings menu.
Managing Tags
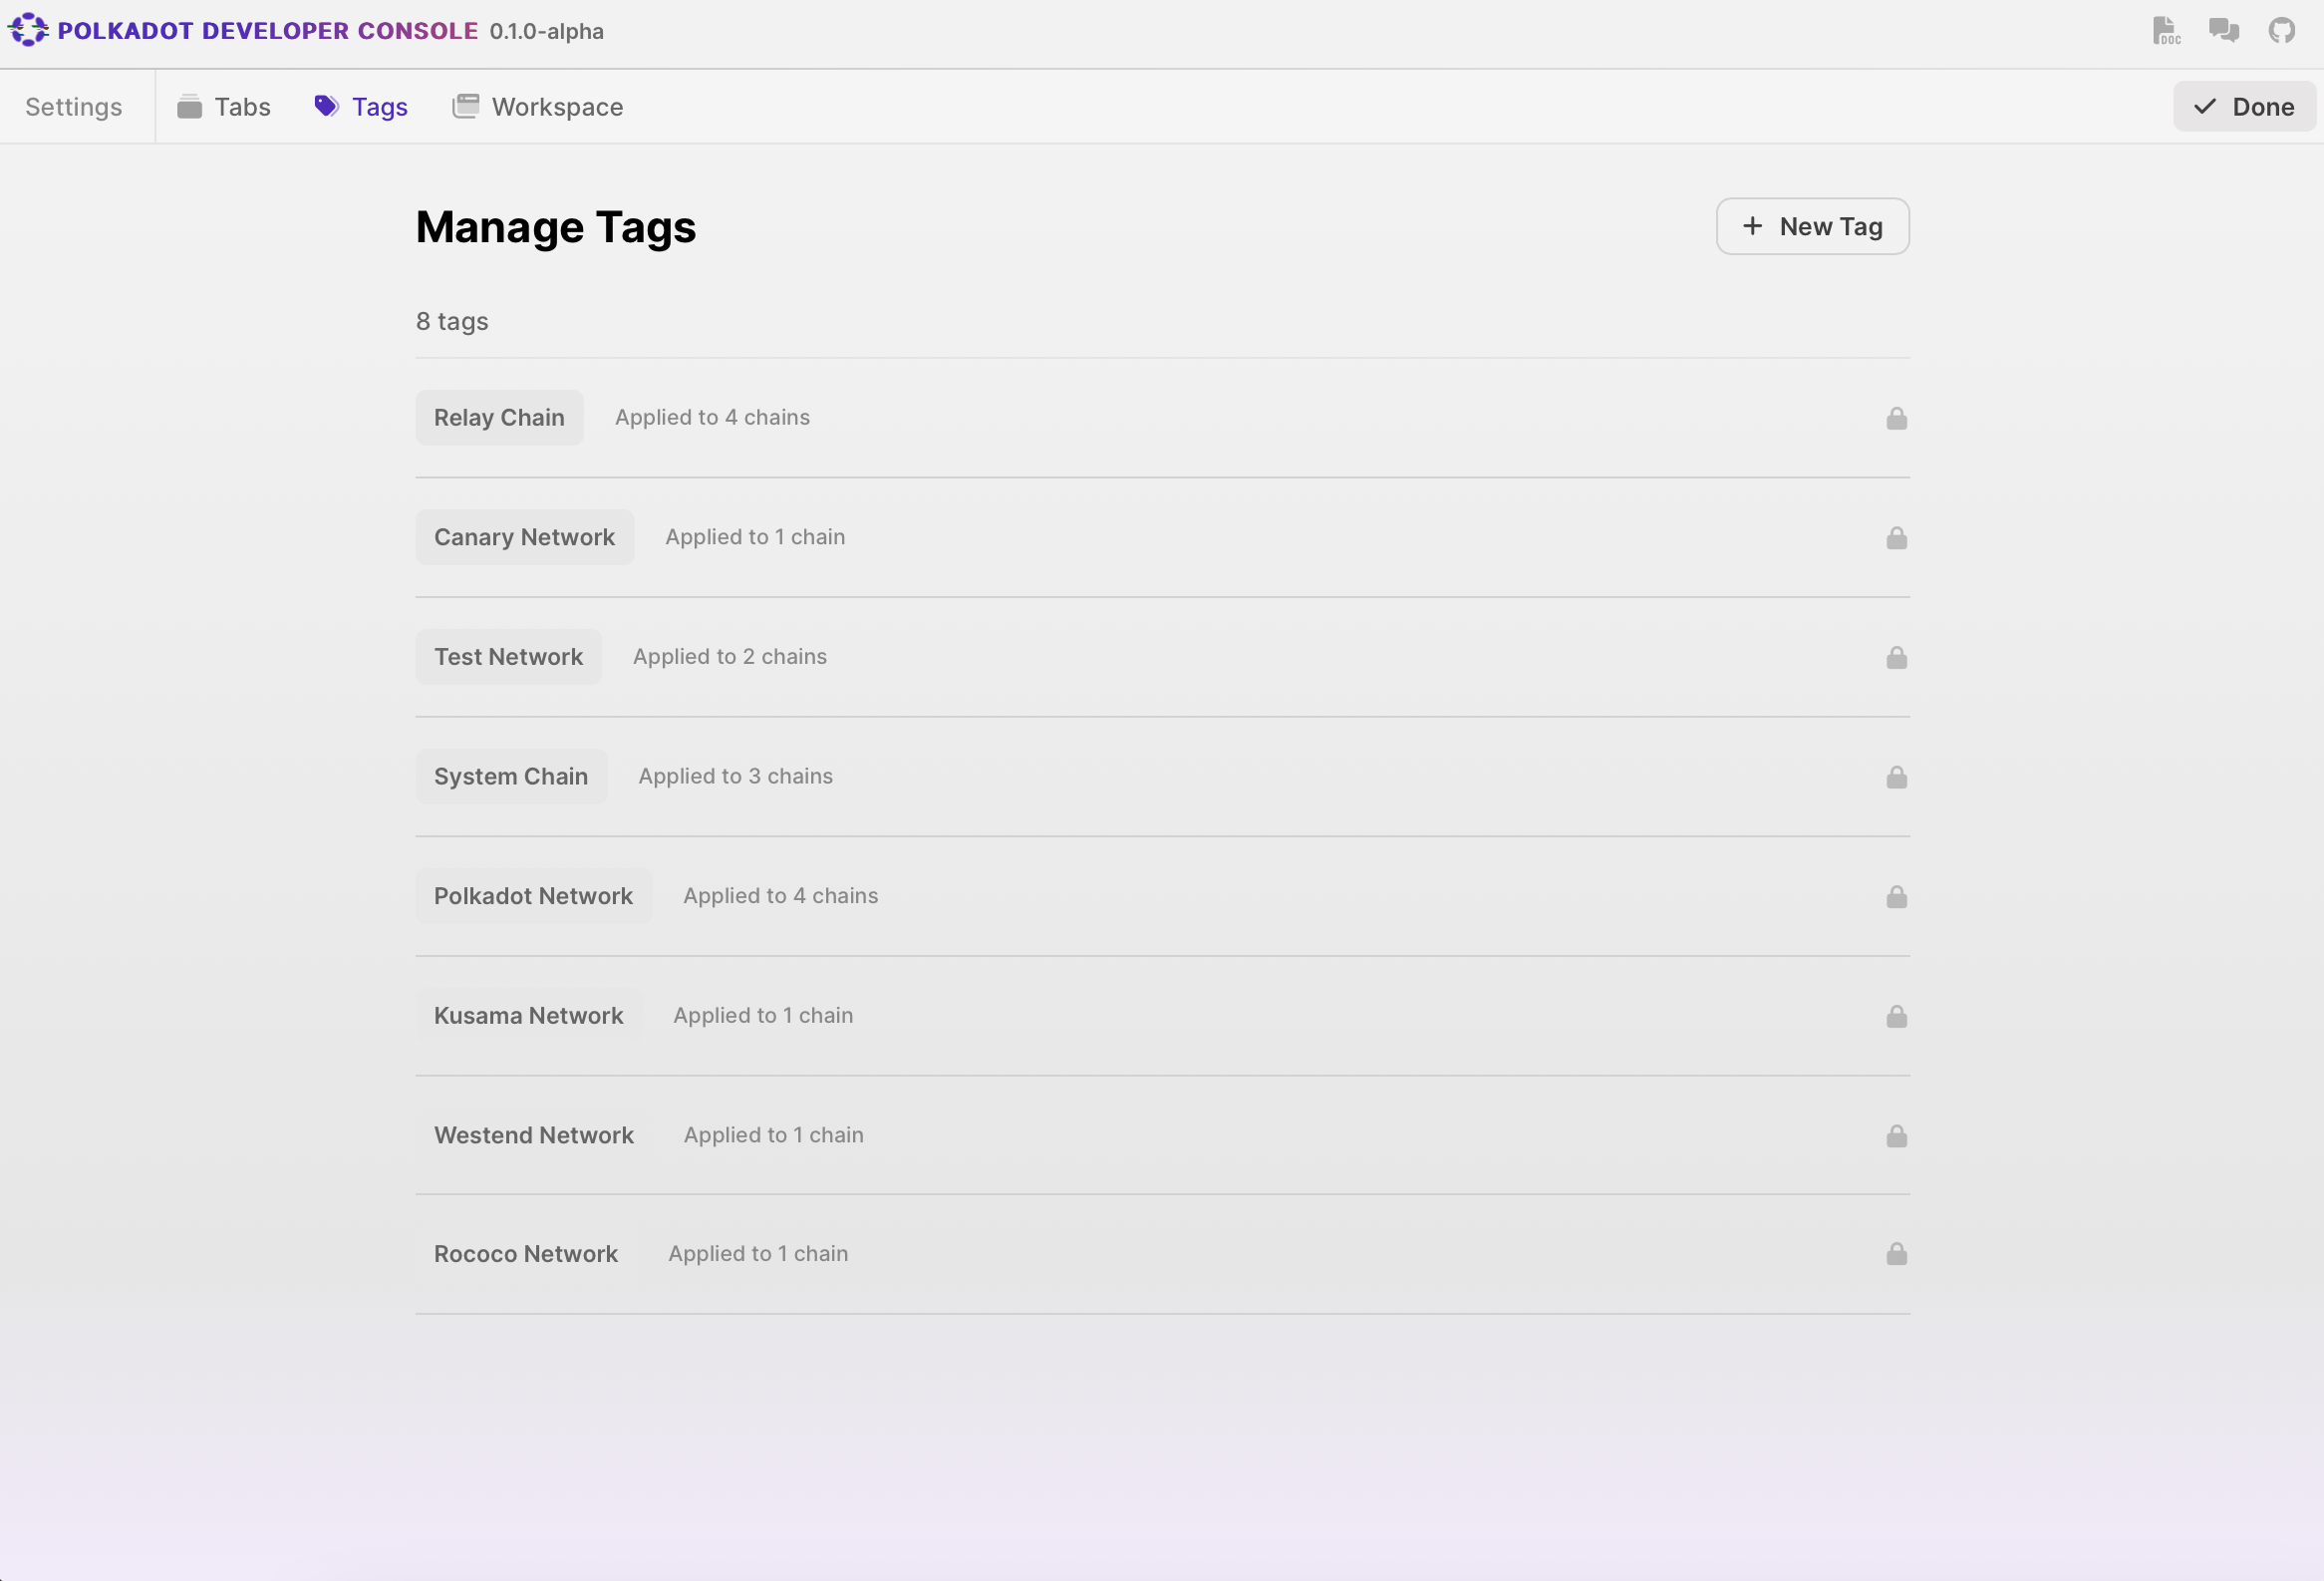
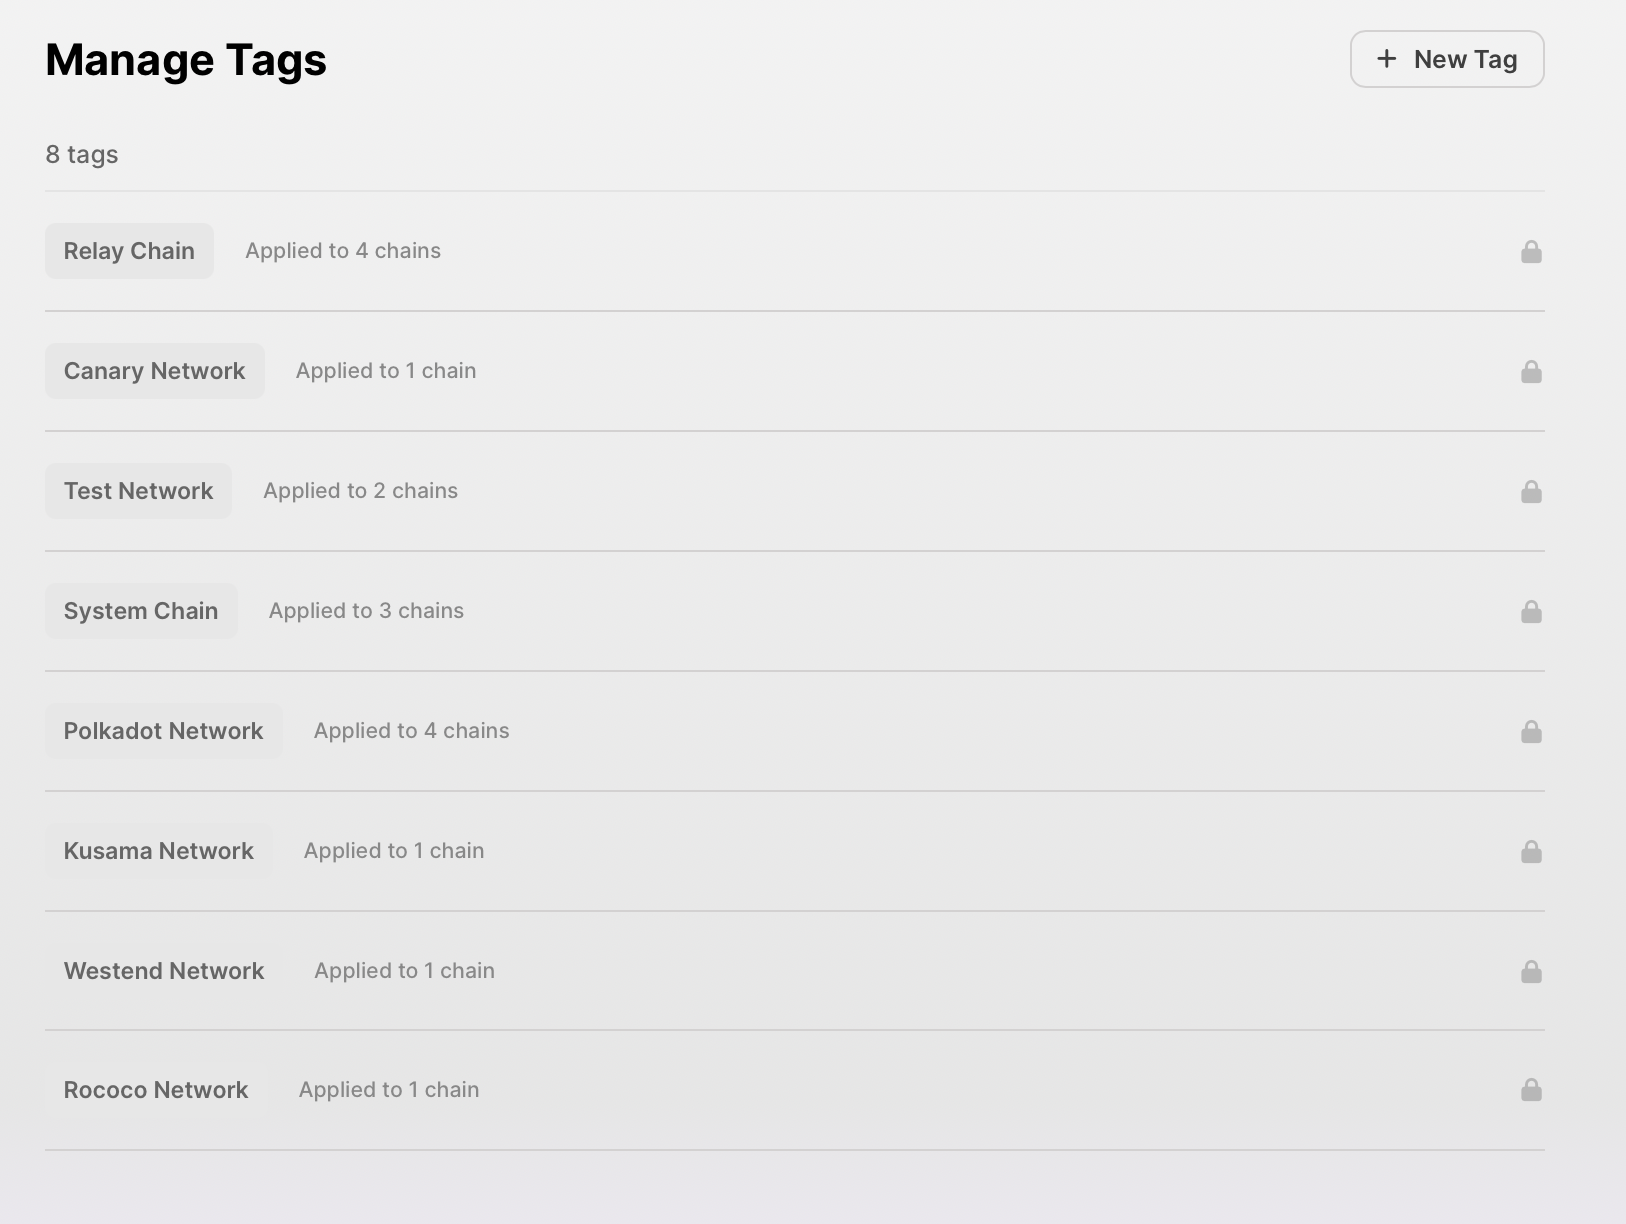
Viewing Existing Tags
The Tags management screen displays a list of all existing tags, both default and custom. For each tag, you can see:
- Tag name
- Number of chains the tag is applied to
Creating a New Tag
To create a new tag:
- Click the + New Tag button at the top-right of the Tags management screen.
- Enter the desired name for your new tag in the "Tag Name" field.
- Click Create Tag to add the new tag to your list.

Applying Tags to Chains
To apply a tag to a chain:
- Navigate to the "Connect Chain" screen.
- Locate the chain you want to tag in the chain list.
- Click the Add button next to the chain's existing tags.
- Select the tag you want to apply from the dropdown menu.
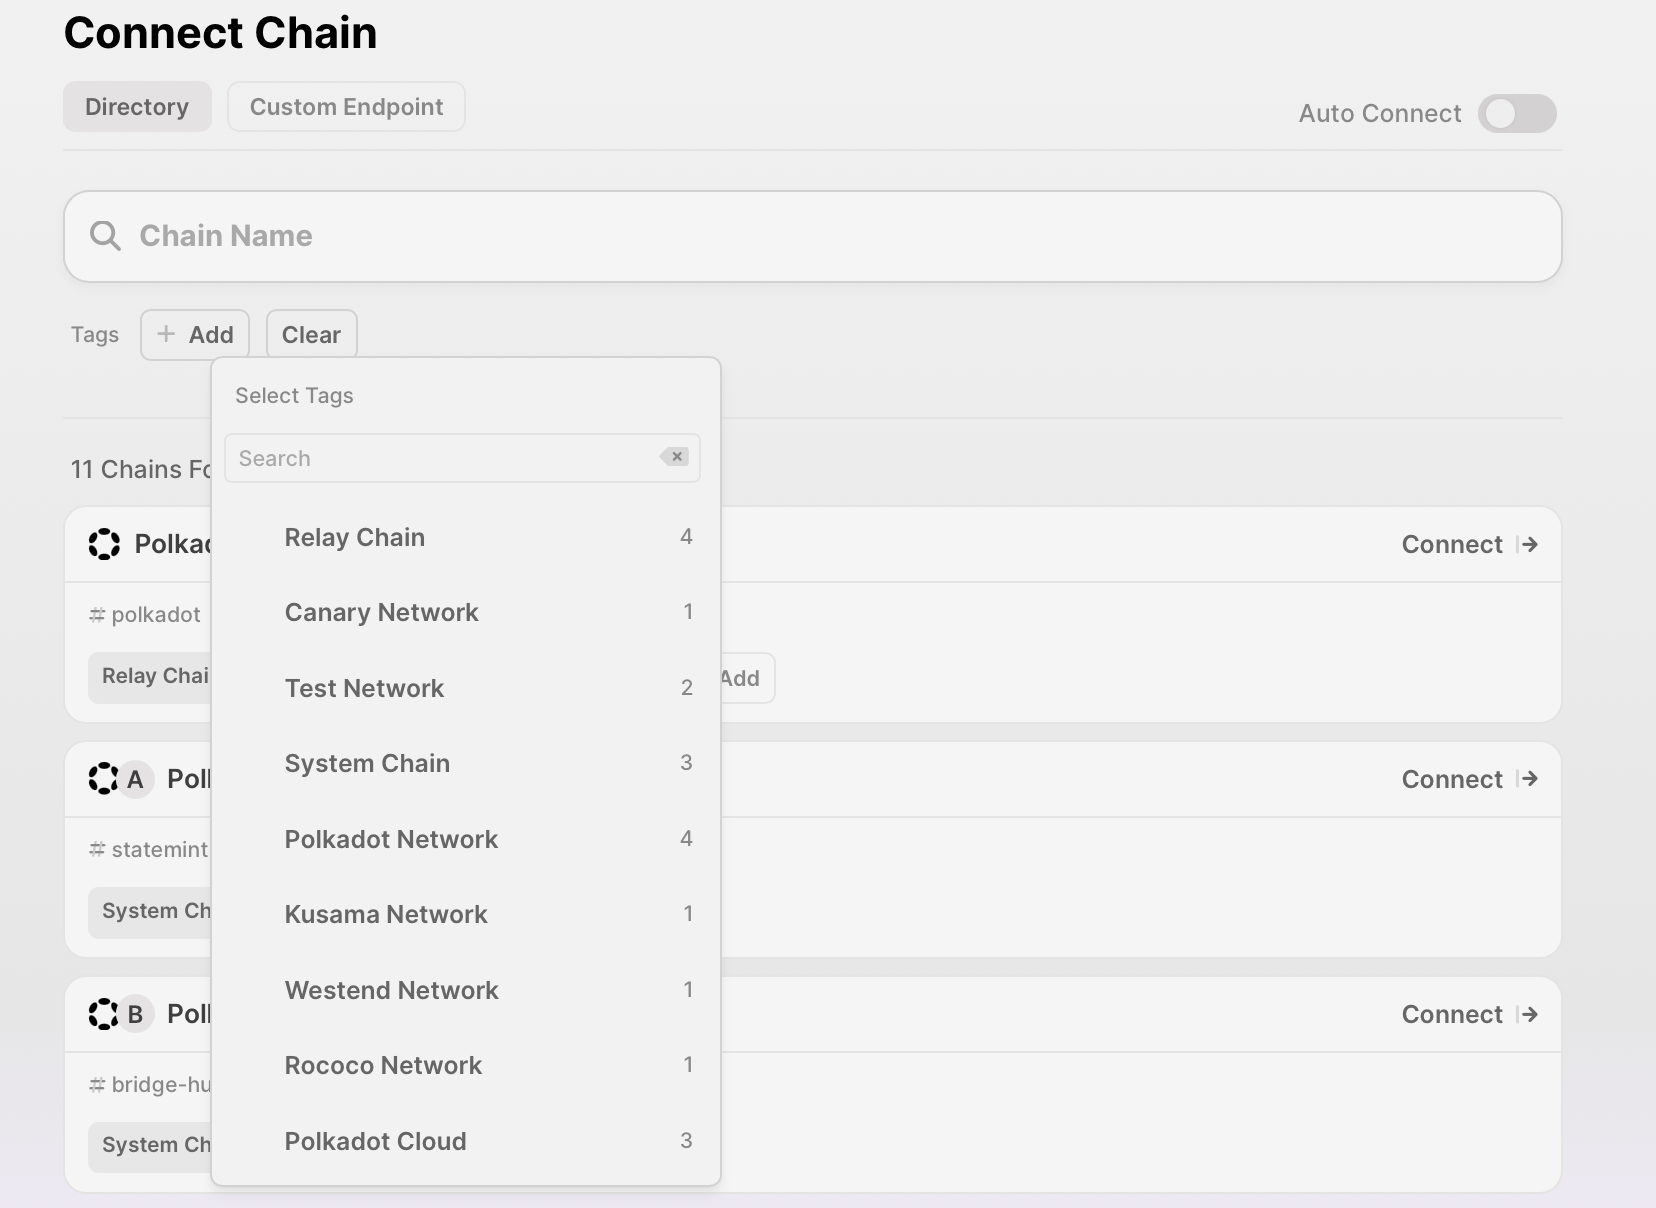
Filtering Chains by Tags
To filter chains using tags:
- On the "Connect Chain" screen, locate the "Tags" section above the chain list.
- Click on one or more tags to filter the chain list. The list will show chains that have any of the selected tag(s).
- To clear filters, click the Clear button next to the Tags section.
Use Cases for Tags
- Group chains by network (e.g., Polkadot, Kusama, Westend)
- Categorize chains by type (e.g., Relay Chain, System Chain, Parachain)
- Create custom categories for specific projects or use cases
By utilizing tags effectively, developers can create a highly organized workspace within the Polkadot Developer Console, tailored to their specific project needs and workflow preferences.